A practical workflow for filling and signing a PDF
Prepare the file, place your edits carefully, and check the exported document before sharing.
Start with the right document
A good document workflow starts before the first annotation. Obtain the current version of the form from its issuer, keep an untouched copy, and check whether the recipient accepts an electronically completed document. A signature drawn on a page is a visual mark; it does not by itself establish the identity verification, audit trail, or certificate associated with every electronic signature service.
Open DocsBee from the tool menu and choose your PDF or image. Check the page count, orientation, and quality of the original scan. If a field is already populated, confirm that you are editing the correct person's copy. Avoid adding confidential information to a sample document or an unfamiliar shared file.
Fill fields without hiding instructions
Zoom in before placing text. Align the first line with the form's baseline, choose a size that fits the field, and make sure long answers remain readable. For a checkbox, use a consistent check or X mark rather than typing an answer beside the box. Work through the pages in order so that dates, contact information, and reference numbers stay consistent.
Annotations and whiteout can change how a page looks, but covering text visually is not a reliable way to remove sensitive information from the underlying file. For confidential material, use a verified redaction process and test that the removed text cannot be copied or recovered.
Place a signature in context
Read the statement beside the signature field before signing. Include a date only where requested, and check whether the form also requires a printed name, title, initials, or witness. A signature image can be reused by anyone who obtains it, so keep the source image private and avoid sending it separately from the completed document.
For documents that require a specific signing platform or identity verification, follow the recipient's process. DocsBee's visual editing tools help place information on the page; acceptance of that completed file depends on the recipient and the document's requirements.
Review the exported copy
Download the completed file and reopen it in a separate viewer. Inspect every page at normal reading size, including the edges of text fields, handwritten marks, and signature placement. Test a printed preview if the document will be printed. Keep the original and the completed copy under distinct filenames, such as application-original.pdf and application-completed.pdf.
Share only the version you have checked. If the recipient reports missing marks, inspect the exported file rather than relying on the appearance of the editing screen.
Worked example: a two-page event registration
Use a blank event-registration form for practice, with fictional details and no real signature. Suppose page one asks for a name, email, and two workshop choices; page two contains a consent statement and signature line. Save the original as event-registration-original.pdf. Before adding anything, list those five tasks so that completing page one does not hide the unfinished consent page from your review.
Place “Sample Attendee” in the name field, use attendee@example.com for the practice email, and mark only the requested workshop choices. If the email crosses a printed border, adjust its placement or size and inspect it at normal zoom. On page two, read the statement before adding a sample mark. Save the result as event-registration-practice.pdf, then open that file separately. Compare the page count, choices, and date with your task list. Repeat this practice sequence before completing a form with real information.
Troubleshooting: choose the next check
Work on a copy while resolving a problem. Change one thing at a time, export again, and compare the new file with the previous attempt.
| What you see | What to check | Next action |
|---|---|---|
| Text extends beyond a box | Field width and text size at normal zoom | Reposition or shorten the answer without omitting required information. |
| Marks appear on the wrong page | Selected page and page order | Return to the intended page; recheck adjacent pages before exporting. |
| Exported marks are missing | Downloaded file versus the editor preview | Reopen the newest export in another viewer; do not send the unchecked copy. |
| The form will not open | Whether the original opens in another viewer | Obtain a fresh copy from the issuer if the source is unreadable or restricted. |
Before sending: export checklist
- The original is retained under a separate filename.
- Every required page, field, checkbox, and attachment has been reviewed.
- Names, dates, and reference numbers agree throughout the document.
- The downloaded copy opens and remains readable at normal size.
- The recipient accepts the completion and signing method used.
- The attachment selected for sending is the final checked version.
Try it with a practice file
Complete a fictional workshop sheet
Download this one-page, fictional form. Add an invented participant name, date, project title, and short note. Try the checkbox, save an edited copy, and reopen it in a separate PDF viewer to inspect the result.
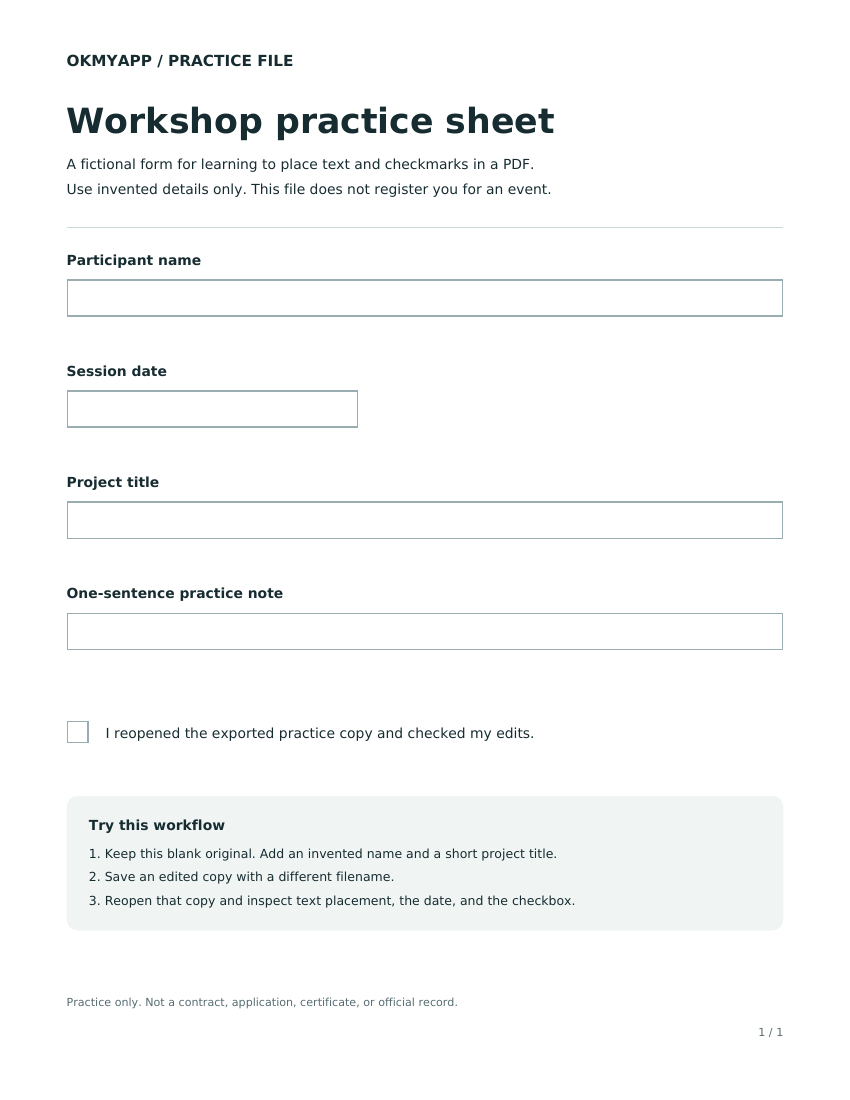
Use invented details only. This is not a contract, application, or official record; nothing is submitted when you complete it. You may need the editor's text or mark tools even if your PDF viewer can fill the fields directly.
Found an unclear step or an unexpected result? Tell the OKMY team the tool, browser, and step involved. Use fictional sample files when reporting a problem.